
No matter how much time your IT staff spends on hardening your data center servers and your company desktops, your security is only as strong as the end users who make use of the hardware. With a single click of the mouse, one of your employees could wreak havoc on your systems. That’s why it’s important for you to constantly be testing your devices. However, you should also be testing your users.
That might sound a bit underhanded, but it’s not. With a simple phishing test, you could not only test the efficacy of your antivirus solutions, but also the knowledge of your end users–that’s key. Until your end users are capable of spotting a suspicious email, they will always be one click away from opening your network up to attack.
How do you test those end users? One way is with the GoPhish phishing toolkit. With GoPhish you can simulate phishing engagements and even help train your employees.
GoPhish is an easy-to-use platform that can be run on Linux, macOS, and Windows desktops. With GoPhish you can create and monitor phishing campaigns, landing pages, sending profiles, and more.
I’m going to show you how to install GoPhish and create a campaign.
SEE: Social engineering: A cheat sheet for business professionals (free PDF) (TechRepublic)
What you’ll need
I’m going to be demonstrating GoPhish on Ubuntu 20.04. The installation of GoPhish is actually quite simple, regardless of platforms, but there is an extra step to take when using Linux (my OS of choice).
To to use GoPhish in the way I will describe, you’ll need a running instance of Ubuntu and a user with sudo privileges.
How to install GoPhish
You don’t actually install GoPhish. Instead, you simply download a zipped file, unpack it, and run the binary.
The first thing you must do is download the GoPhish zipped file from the official download page. Once the download completes, open a terminal window, change into the directory housing the download, and create a new directory with the command:
mkdir gophish
Move the zipped file into that directory with the command:
mv gophish*.zip gophish
Change into the new directory with the command:
cd gophish
Next, unpack the file with the command:
unzip gophish*.zip
When the unpacking completes, you’ll find (among other things) the GoPhish binary file. In order to execute that file, you need to give it the proper permissions with the command:
chmod u+x gophish
How to run GoPhish
In order to use GoPhish properly, recipients of your phishing test campaign must be able to access the phishing server. Because of this, you should not use the loopback address, but instead use the IP address of the URL of the phishing server. That, of course, means the server must be reachable. To make sure GoPhish is accessible from your LAN, you need to make one simple adjustment to a configuration file. Back at your terminal window, issue the command:
nano config.json
In that file, look for the line:
"listen_url": "127.0.0.1:3333",
Change that line to:
"listen_url": "SERVER_IP:3333",
Where SERVER_IP is the IP address of the hosting machine.
Save and close the file.
Now you can start GoPhish with the command:
sudo ./gophish
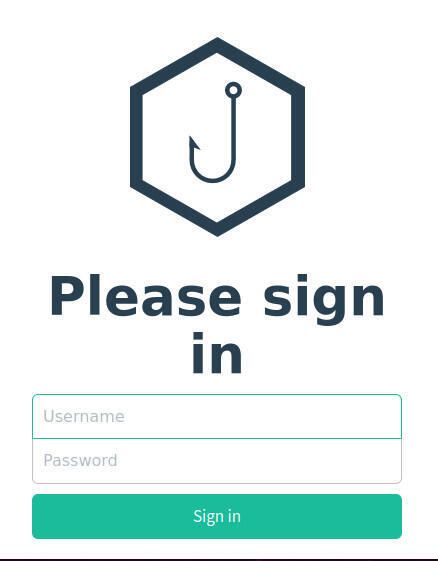
This will start the built-in GoPhish server. Once it is running, you should see a line in the output informing you of the default credentials for your instance. The username is admin and the password is a random string of characters. Copy that string of characters and then open a web browser. Point the browser to https://SERVER_IP:3333 (where SERVER_IP is the IP address or URL of your hosting server). When prompted, enter the default login credentials (Figure A).
Figure A
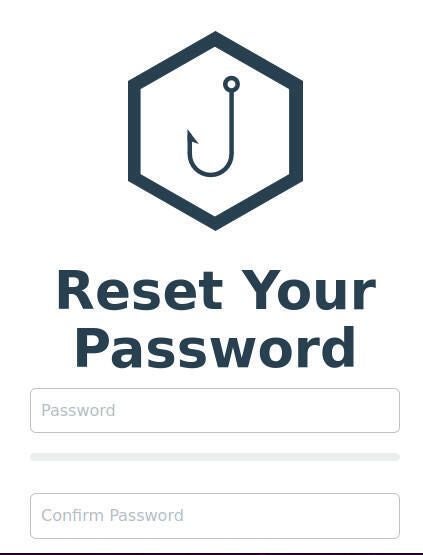
You will then be prompted to change the admin password (Figure B).
Figure B
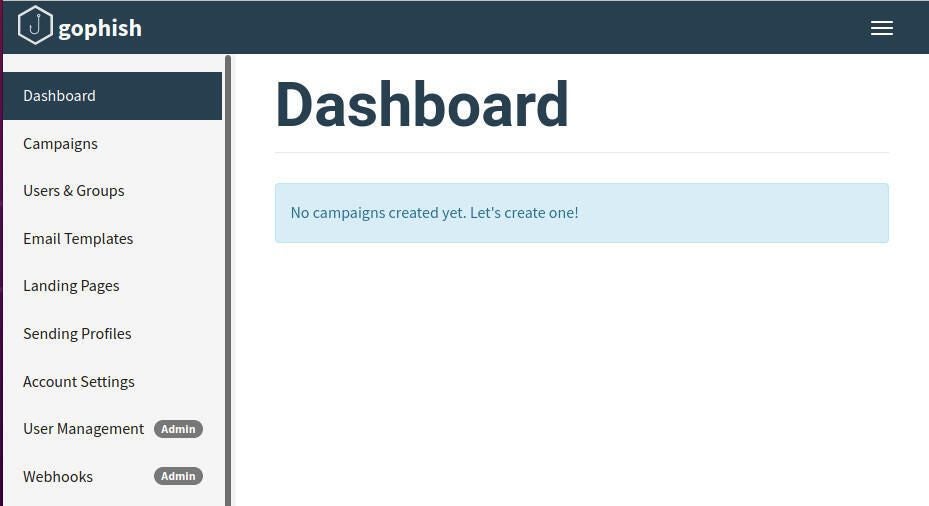
Once you’ve successfully changed the admin password, you’ll find yourself on the GoPhish dashboard (Figure C).
Figure C
How to start a GoPhish campaign
Sending a GoPhish campaign is fairly straightforward–if you know where to begin. You can’t just click New Campaign and start out, because you first must create a few pieces so the puzzle can come together.
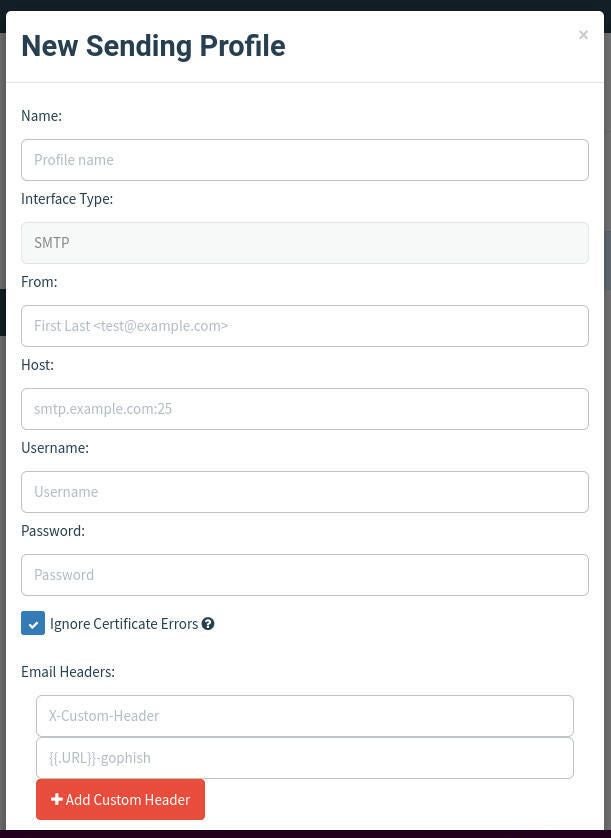
The sending profile is an SMTP configuration (otherwise GoPhish wouldn’t be able to send out campaigns). Click Sending Profiles in the left sidebar and click New Profile. In the resulting window configure an SMTP server to be used for the campaign (Figure D).
Figure D
Next, create an email template by clicking Email Templates in the left sidebar and clicking New Template. In the new template window, create a template to be used for your campaign (Figure E).
Figure E
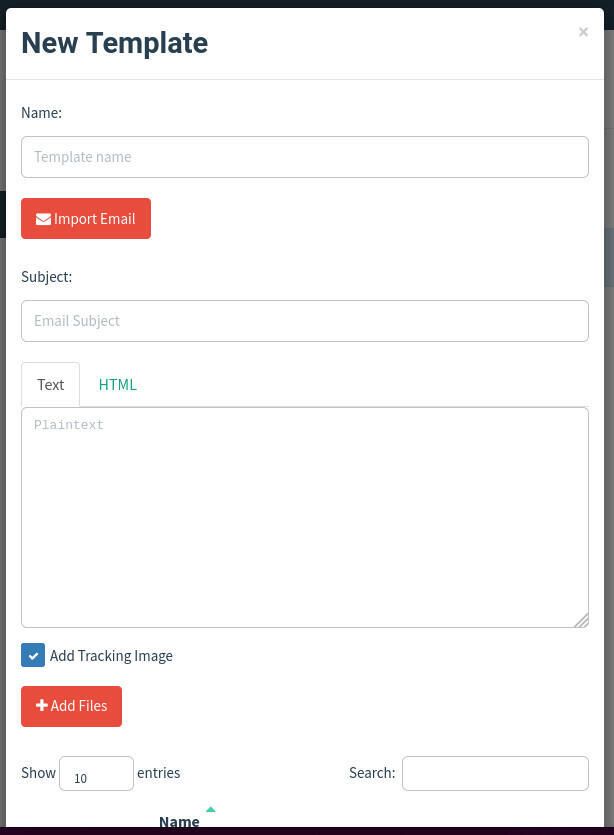
When creating a template, it’s important that you use variables. For instance, in a subject line you would use something like:
Password Reset for {{.Email}}
Then, in the body of the email, you might use something like:
{{.FirstName}},
The password for {{.Email}} has expired. Please reset your password here.
Thanks,
Your IT Team
You would then want to add a link for the word here. Open the Link Dialog and then use {{.URL}} as the URL.
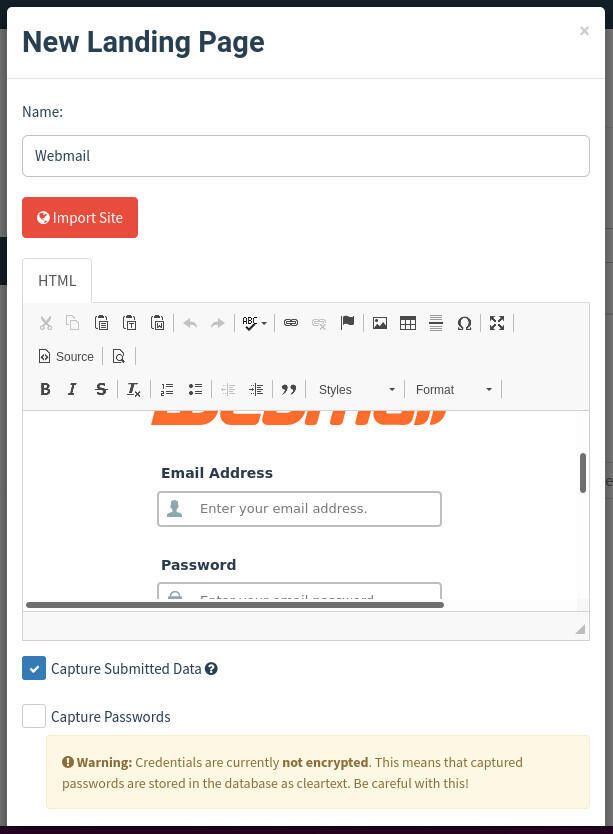
Next, you need to create a landing page. This will simulate a page where users will attempt to log in to their service or change their password. For this, you’ll need to use an actual website that requires users to log in or change their password. This can be one of your own servers or that of a third-party. Click Landing Page and then click New Landing Page.
In the resulting window, give the page a name, click Import Site, type the URL of the login page to be used, click Import, click the check boxes for Capture Submitted Data and (optionally) Capture Password (Figure F).
Note: Credentials are not encrypted, so you might not want to capture passwords.
Figure F
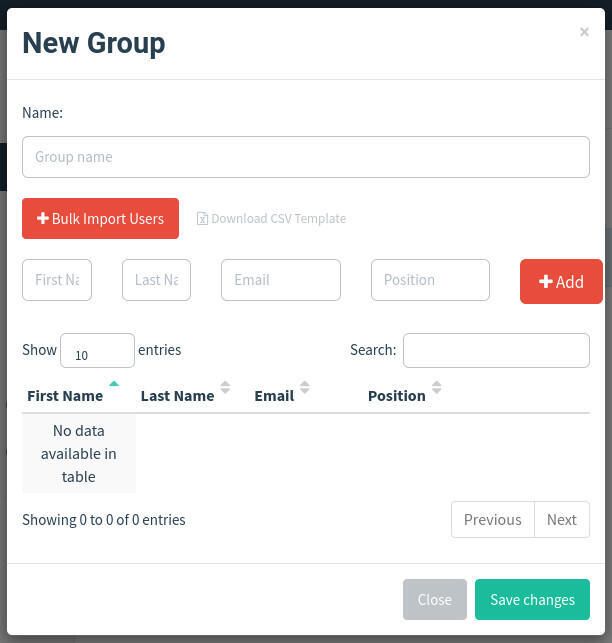
Finally, you must create a new group. Click Users & Groups in the left sidebar and click New Group. In the popup window, create a new group and then add or import users. These users will be the email addresses you send the phishing campaign to (Figure G).
Figure G
After you’ve created a profile, template, landing page, and a group, you can now click Campaigns and then click New Campaign. In the New Campaign window, fill out all of the information, selecting the new bits you just created (Figure H).
Figure H
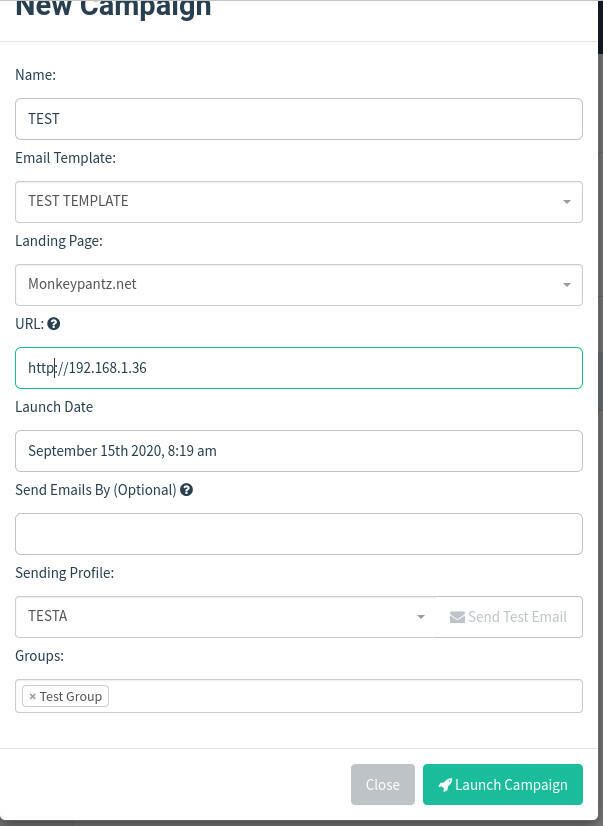
The only bit of information that might trip you up is the URL. The URL is that which populates the {{.URL}} template value and must be reachable by the recipient. It also must be the domain or IP address of your GoPhish server.
Once you’ve filled out all of the information, click Launch Campaign, which will immediately launch the campaign to the recipient list you created in the Groups section.
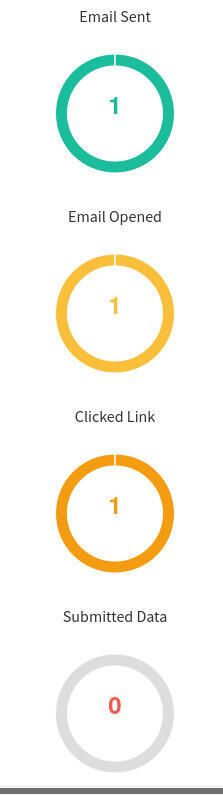
The recipients will receive the campaign and (very possibly) click on the link. When they do, GoPhish will record the data. You can then go to the Dashboard and view the results, which will even inform you which users opened the email, which users clicked the phishing link, and which users submitted data to the clicked link (Figure I).
Figure I
And that’s all there is to creating and launching a phishing campaign with GoPhish. If you have end users in your company, you owe it to them, to yourself, and to the security of your company’s resources to run these types of campaigns now and then.
Subscribe to TechRepublic’s How To Make Tech Work on YouTube for all the latest tech advice for business pros from Jack Wallen.

Image: iStock/hywards
