You’re creating a document in Microsoft Word with sensitive or important information, and you want to make sure it doesn’t fall into the wrong hands or can be modified with unwanted changes. Microsoft Word offers several ways to secure a document so that other people can’t view or edit it.
You can protect your Word document by making it read-only, applying a password, restricting editing, adding a digital signature or marking it as final. Let’s check out these Microsoft Word security options.
Note: The options I cover here apply to any version of Word from the past several years, so you should be able to follow these steps with any recent edition of the software.
Jump to:
- How to make a Microsoft Word document read-only
- How to apply a password to your Microsoft Word document
- How to restrict editing of a Microsoft Word document
- How to add a digital signature to a Microsoft Word document
- How to mark a Microsoft Word document as final
How to make a Microsoft Word document read-only
One easy way to protect your Word document is to make it read-only. In this scenario, anyone who opens your Word document will be prompted to view it in read-only mode by default. The downside is that anyone can easily bypass the read-only option to modify and resave the document. So, this is strictly a way to prevent people who read your Word document from making accidental changes to it.
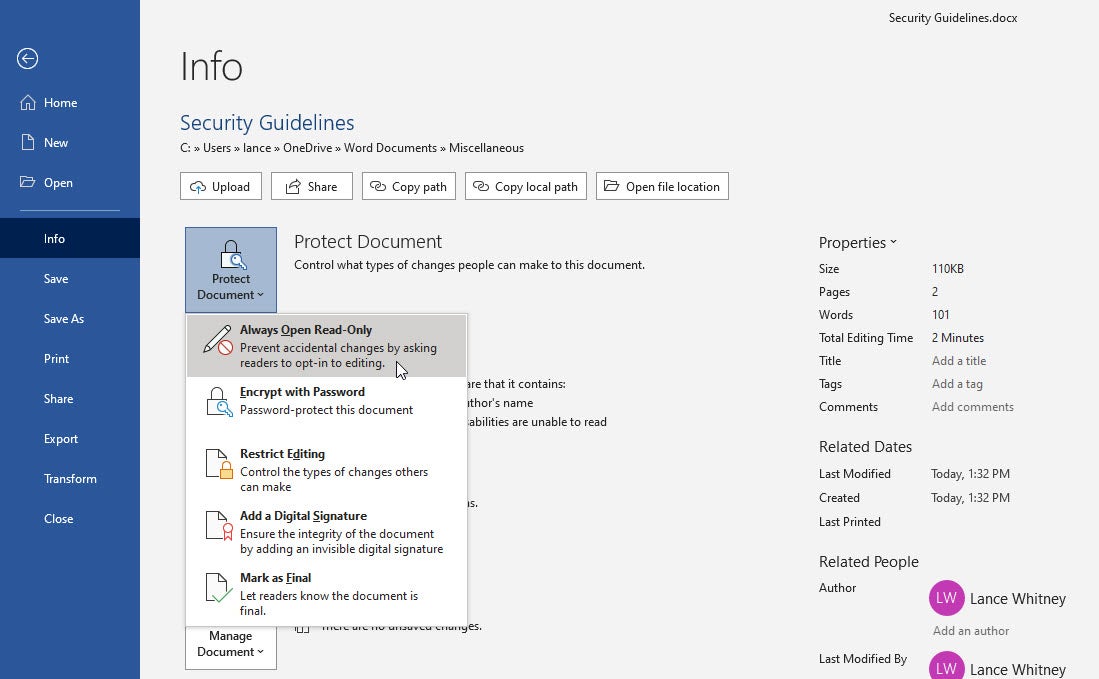
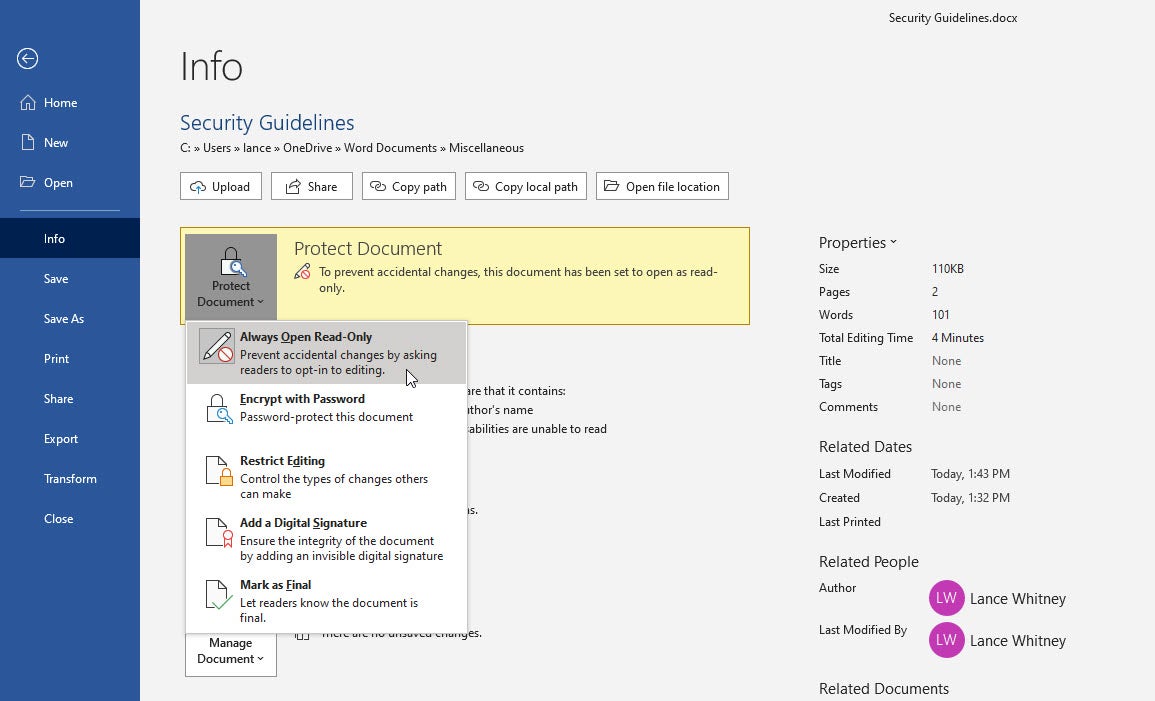
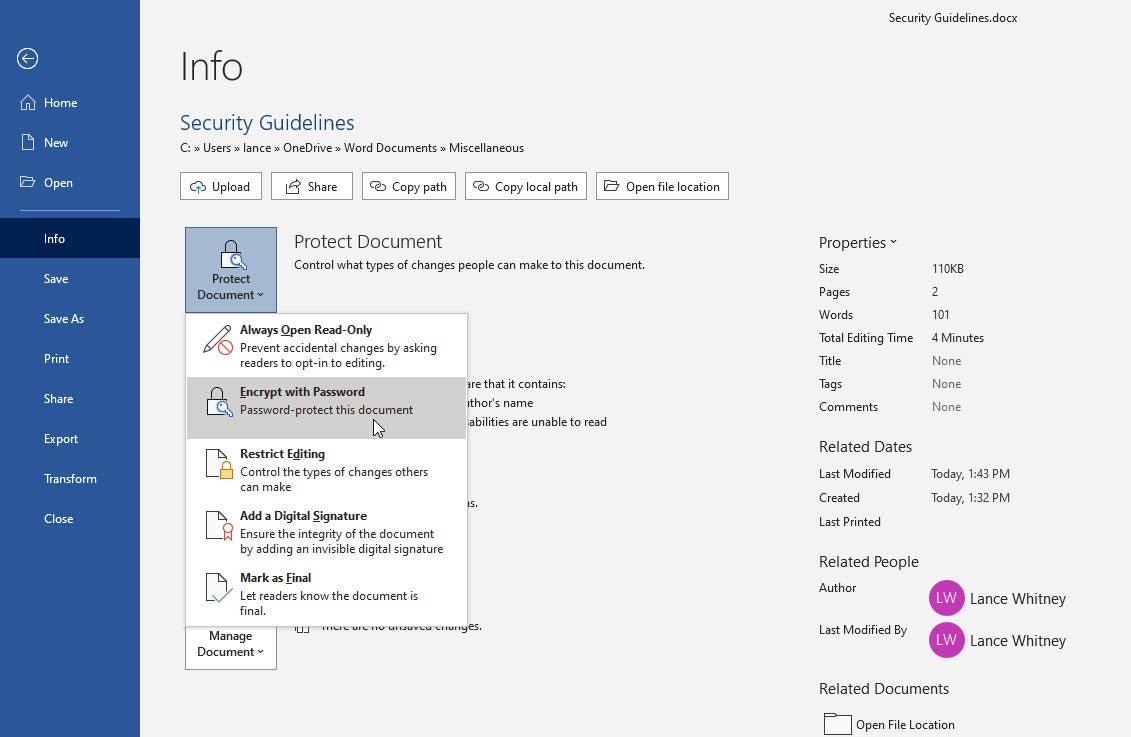
To set your Word document to read-only, click the File menu and select Info. At the Info screen, click the button for Protect Document and select Always Open Read-Only (Figure A). Save and close the document.
Figure A
When someone tries to open the Word document, a message appears saying that the author would like you to open it as read-only (Figure B). The default option is to click Yes to open it as read-only.
Figure B

This option works as a toggle. To remove the read-only option, return to the Info screen, click the button for Protect Document and then click the option for Always Open Read-Only (Figure C).
Figure C
How to apply a password to your Microsoft Word document
A more secure way to protect your Word document is to apply a password to it. In this case, anyone who tries to open the document will need to know and enter the password.
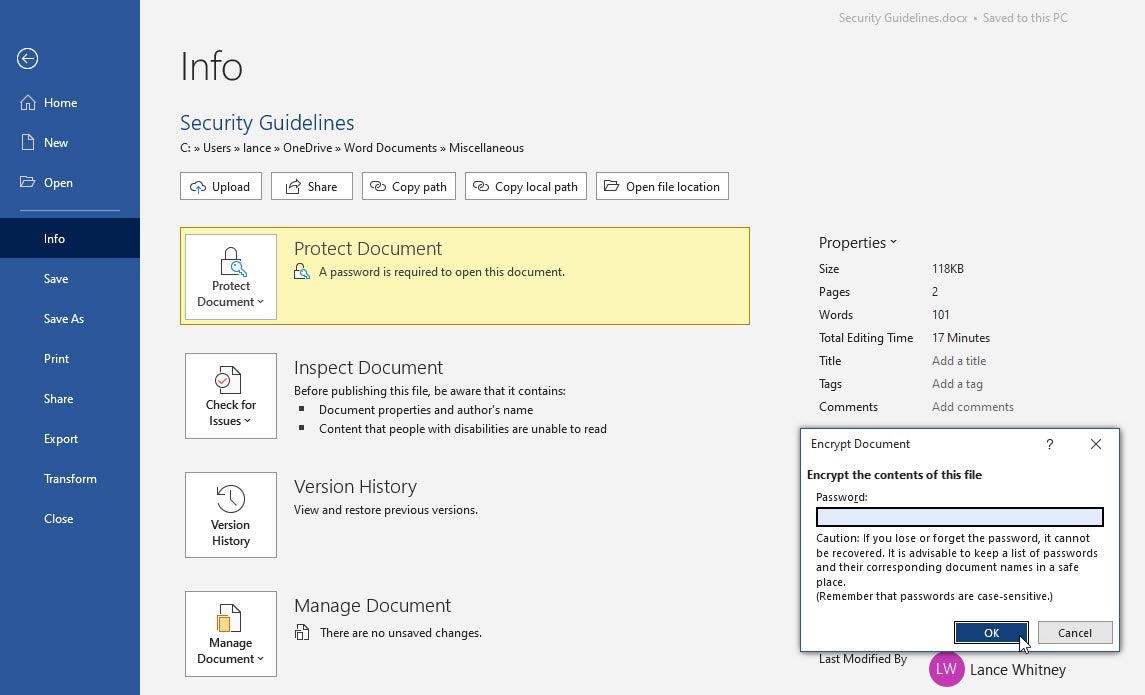
To set this up, click the File menu and select Info. At the Info screen, click the button for Protect Document, and then click the option for Encrypt With Password (Figure D).
Figure D
Type and then retype the password you want to apply. Save and close the document. You’ll now need to find a secure way to share the password with the intended recipients. The next time anyone tries to open the file, Word will prompt them to supply the password.
To remove the password, open the Word document and return to the option for Encrypt With Password. Remove the asterisks from the password field so the field is blank and then save the document (Figure E).
Figure E
How to restrict editing of a Microsoft Word document
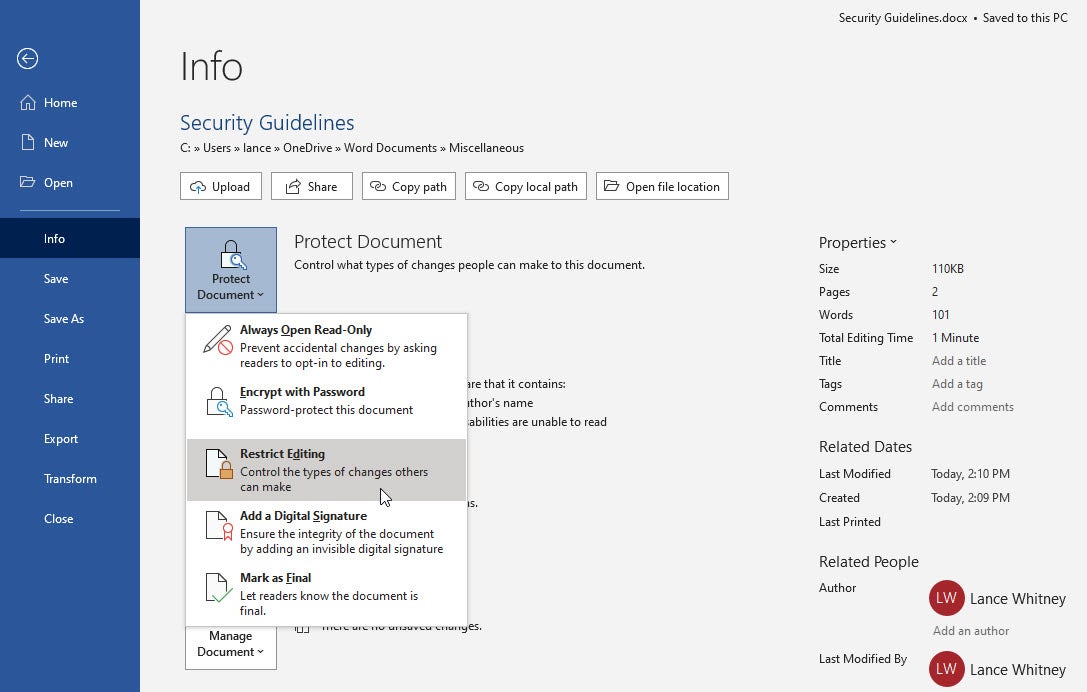
You can allow other people to view and read a Word document but limit the types of edits they can make to it. For this method, return to the Info screen, click the Protect Document button and select Restrict Editing (Figure F).
Figure F
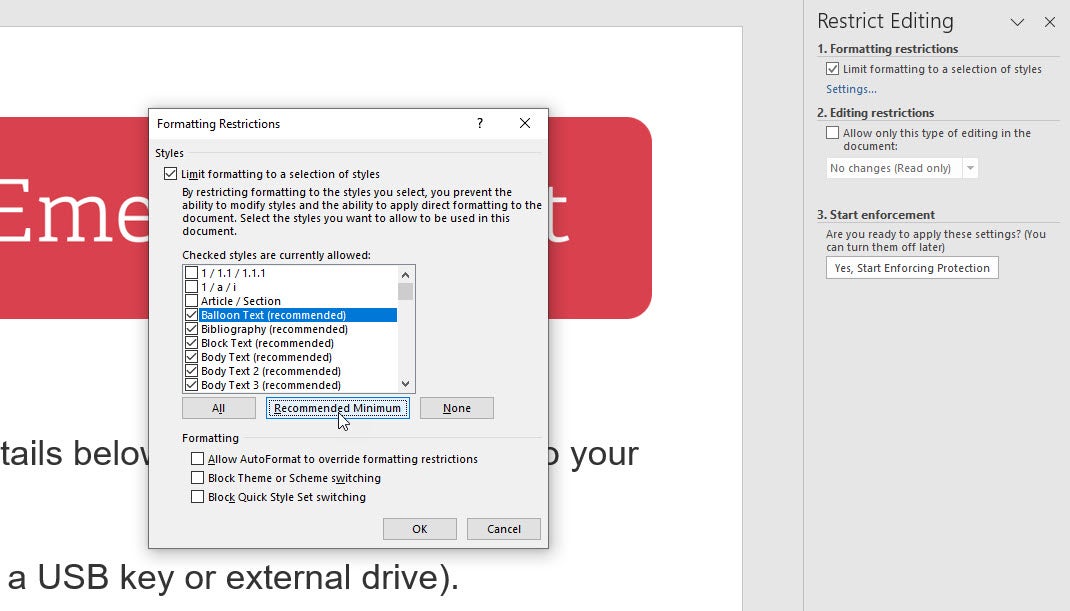
Word returns you to your document where it displays a Restrict Editing sidebar on the right. This option offers two types of restrictions: one for text formatting and one for text editing. To limit the formatting, check the box under Formatting Restrictions and then click the Settings link. By default, all the styles are selected so the associated formatting can’t be changed. You can deselect individual styles or make a more sweeping change by clicking one of the buttons: All, Recommended Minimum or None. You can also check any of the settings under Formatting (Figure G).
Figure G
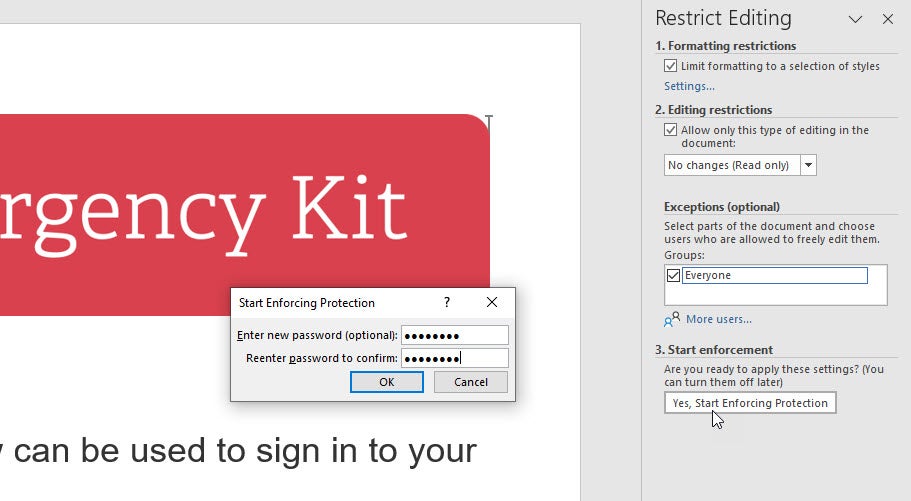
To restrict editing, check the box under Editing restrictions. Click the dropdown menu below and choose the type of editing allowed: Track Changes, Comments, Filling In Forms or No Changes (Read Only). To allow people to edit specific areas of the document, check the box for Everyone. Click the down arrow next to Everyone, and then you can go through each section in the document to set whether it can be edited. When you’re done, click the button for Yes, Start Enforcing Protection. Type and then retype a password to allow you to remove the restrictions. When you’re done, save and close the file (Figure H).
Figure H
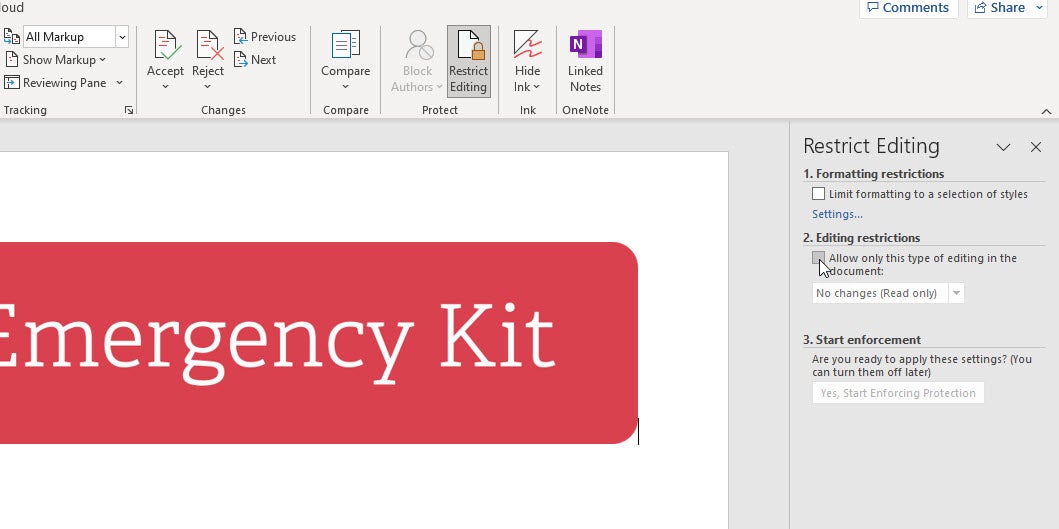
To disable the protection, open the document. Click the Review tab and click the Restrict Editing icon. Click the Stop Protection button at the bottom of the Restrict Editing pane. Type the password and click OK. Then, uncheck the options for Editing restrictions on the pane (Figure I).
Figure I
How to add a digital signature to a Microsoft Word document
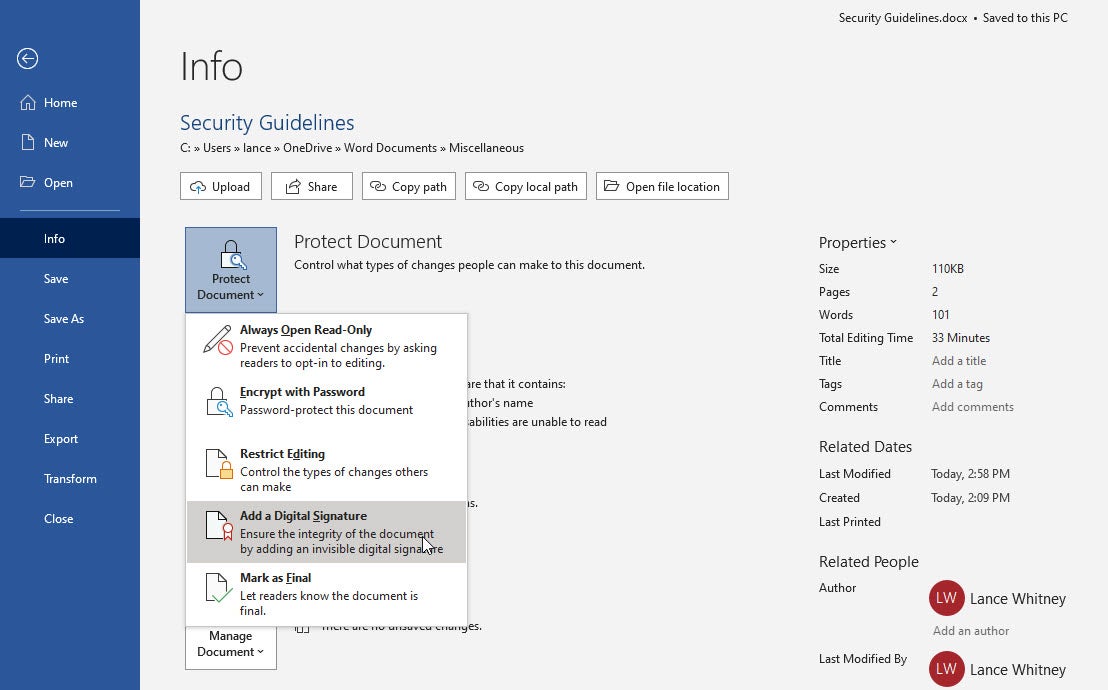
A digital signature informs people who view your Word document that you and no one else signed it. It also shows you were the last person to revise it. To set this up, return to the Info screen, click the Protect Document button and select Add a Digital Signature (Figure J).
Figure J
The first time you do this, Word displays a message asking if you want to set up a digital signature. Answer Yes, and a Microsoft support page helps you find a digital ID. Follow the links for the different providers to get a digital ID. Click the link for Add Or Remove A Digital Signature In Office files. After you’ve obtained the digital ID, return to the Protect Document button and again click Add A Digital Signature. Fill out the necessary fields, click the Sign button and then click OK.
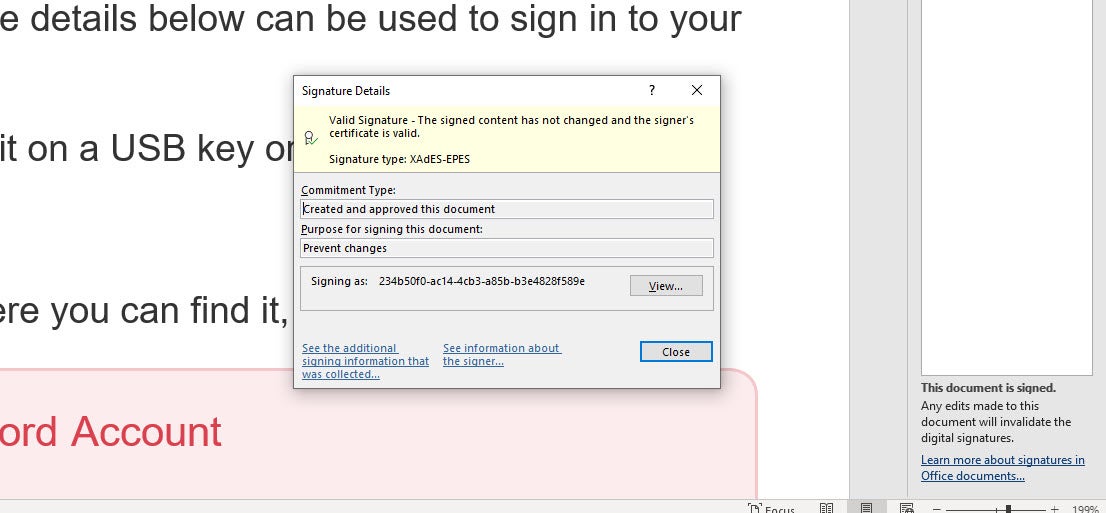
Your Word document is now digitally signed and read-only (Figure K). Anyone who opens the document will read the notice of your digital signature. If someone tampers with it, the signature becomes invalid.
Figure K
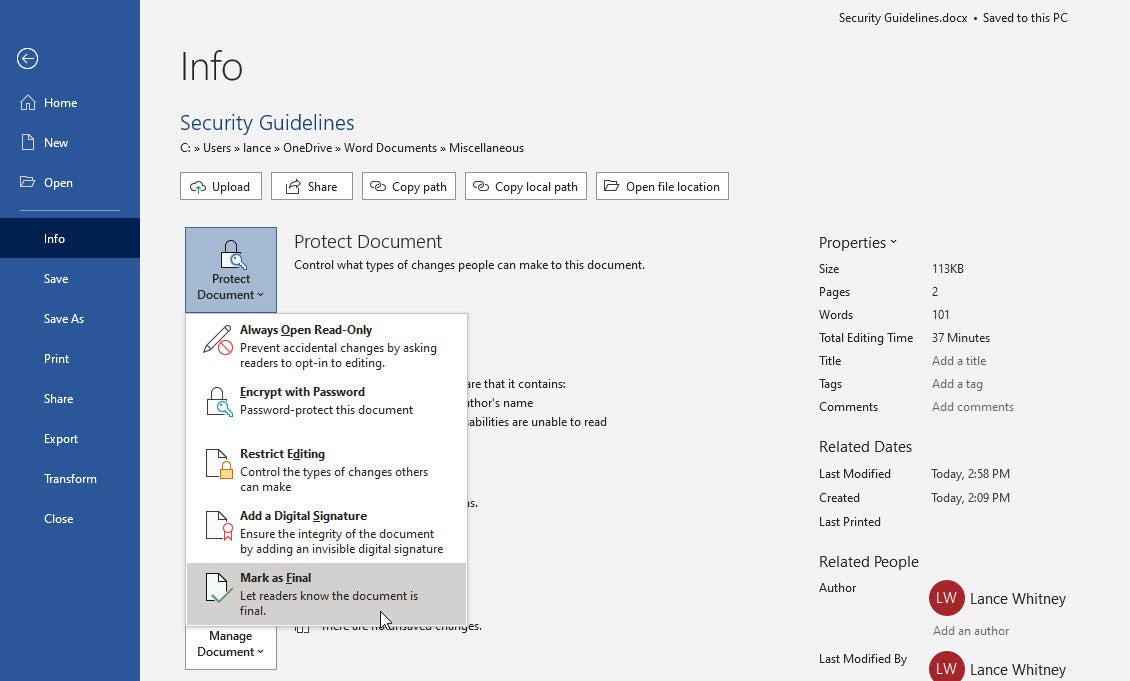
How to mark a Microsoft Word document as final
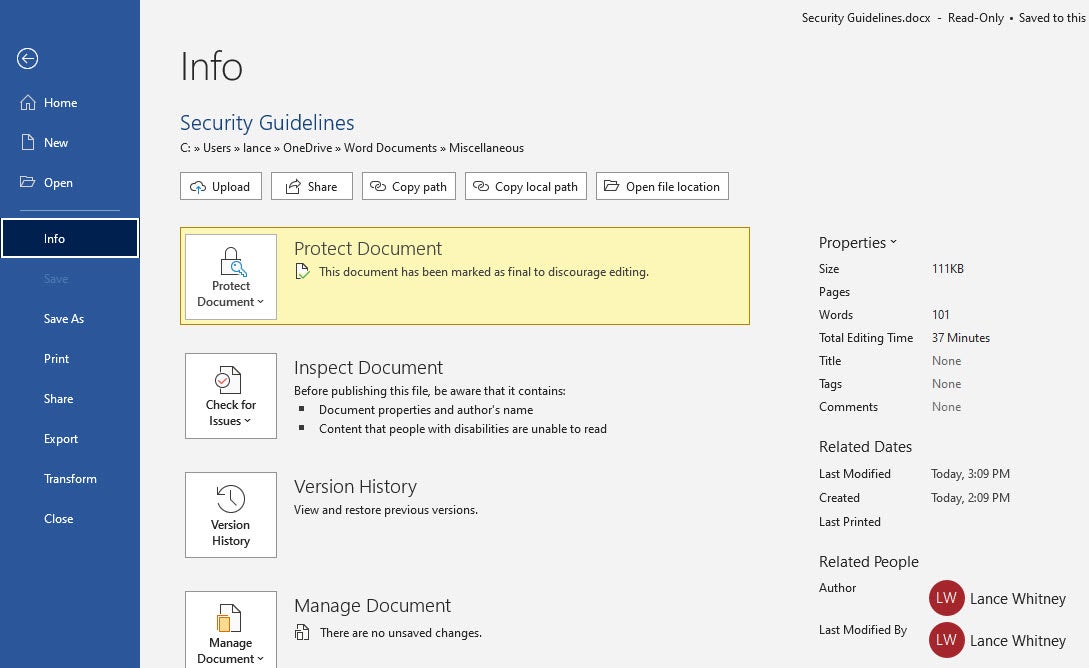
One more method of protecting your Word document is to mark it as final – this lets any recipient know the document is finalized. Someone can still modify or edit the document, but if they do so, the document is no longer marked as final.
To set this up, return to the Info screen, click the Protect Document button and select Mark As Final (Figure L).
Figure L
Anyone who opens the Word document will see a notification that the author has marked the document as final (Figure M). Going to the Info screen also indicates the document as final. If anyone changes the document, the notification no longer appears.
Figure M