

In last week’s article, How to get more from Windows Defender by using its command-line tool, I told you that Windows Defender’s command-line utility lets you automate basic tasks and handle certain advanced operations. I then showed you how to use the tool and provided several examples of ways it can come in handy.
In addition to Windows Defender’s command-line utility, Windows 10 also provides you with a set of PowerShell cmdlets that let you perform many of the same types of Windows Defender operations you can perform using the Windows user interface and command-line utility. However, as I began investigating these Defender-specific cmdlets in more detail, I discovered some interesting ways to explore and examine Windows Defender in ways that are not found in the other versions.
The Defender cmdlet that really caught my attention is called Get-MpThreatCatalog. It enables you to investigate Windows Defender’s malware signature definitions database. More specifically, it allows you to see all of the malware threats that Windows Defender is able to protect against. By itself, the Get-MpThreatCatalog cmdlet offers an exhaustive listing of all Windows Defender’s signature definitions that is difficult to digest. But when you combine this cmdlet with other PowerShell tools and features, you can really delve into the database and find some specific and interesting information.
As I was exploring the database in this way, I gained a better appreciation of Windows Defender’s capabilities. It also made me wonder about all those claims that Windows Defender’s ability to guard against malware pales in comparison other more mature antivirus software packages.
Let’s take a closer look at PowerShell’s Defender-specific cmdlets. Then we’ll investigate what’s in Windows Defender’s malware signature definitions database.
SEE: 10 PowerShell commands to make remote management easier
Launching PowerShell
To use PowerShell to access the Defender cmdlets, you need to launch PowerShell in Administrator mode. The quickest way to do so is to launch File Explorer, open any folder, pull down the File menu, and then select the Open Windows PowerShell As Administrator command, as shown in Figure A.
Figure A
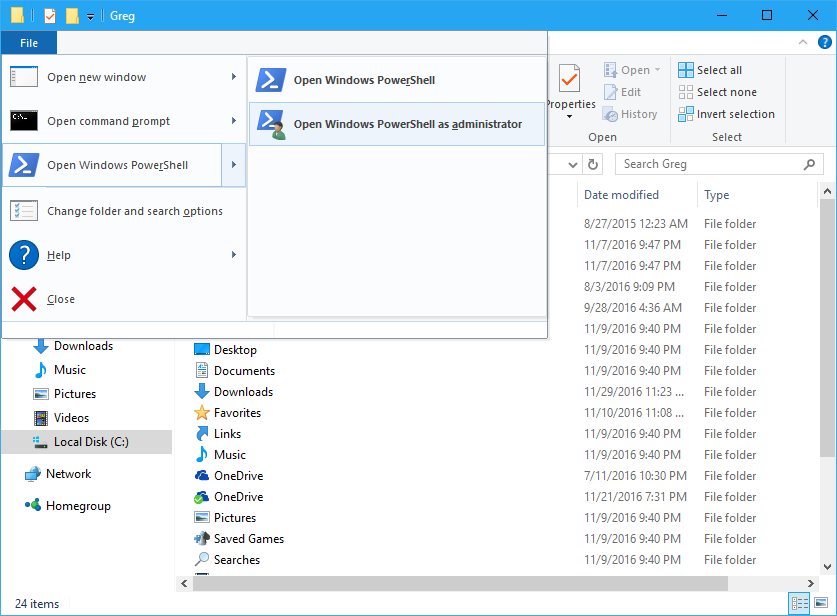
You can open an Administrator Windows PowerShell prompt from within File Explorer.
PowerShell’s Defender cmdlets
Windows PowerShell provides a set of 12 Defender cmdlets. To see a list, just type:
Get-Command -Module Defender
at the PowerShell prompt, as shown in Figure B.
Figure B
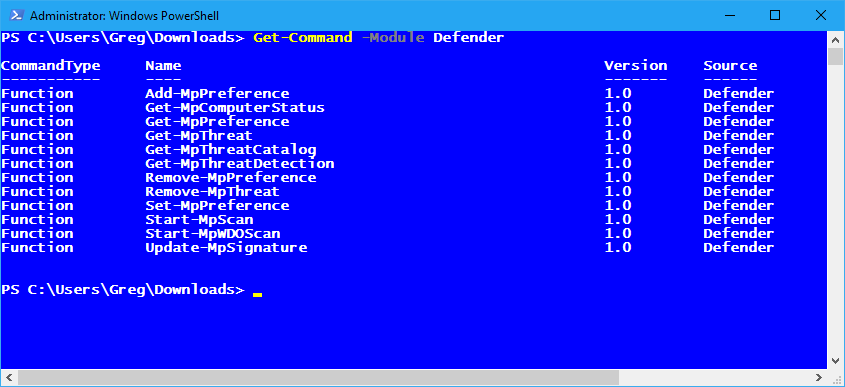
You can get a list of the Defender cmdlets by using Get-Command.
The 12 Defender cmdlets are described in this table.
| Cmdlet | Description |
| Add-MpPreference | Modifies settings for Windows Defender. |
| Get-MpComputerStatus | Gets the status of anti-malware software on the computer. |
| Get-MpPreference | Gets preferences for the Windows Defender scans and updates. |
| Get-MpThreat | Gets the history of threats detected on the computer. |
| Get-MpThreatCatalog | Gets known threats from the definitions catalog. |
| Get-MpThreatDetection | Gets active and past malware threats that Windows Defender detected. |
| Remove-MpPreference | Removes exclusions or default actions. |
| Remove-MpThreat | Removes active threats from the computer. |
| Set-MpPreference | Configures preferences for Windows Defender scans and updates. |
| Start-MpScan | Starts a scan on the computer. |
| Start-MpWDOScan | Starts a Windows Defender offline scan. |
| Update-MpSignature | Updates the anti-malware definitions on the computer. |
Getting help
For more information about any of the cmdlets, use the Get-Help cmdlet:
Get-Help
Get-Help
Get-Help
If PowerShell doesn’t yet contain detailed help for the Defender cmdlets, you’ll need to update the help. To do so, at the PowerShell prompt, type Update-Help and press Enter. PowerShell will then download the newest help files for PowerShell’s commands and install them on your computer. It will take a few minutes for this download and installation process to occur.
SEE: Windows administrator’s PowerShell script kit (Tech Pro Research)
Performing a few standard operations
The Start-MpScan cmdlet on the PowerShell prompt lets you run a scan on your system. For example, if you want to run a quick scan, you’ll use the command:
Start-MpScan -ScanType QuickScan
If you want to run a full scan, you’ll use the command:
Start-MpScan -ScanType FullScan
If you want to scan a particular folder, such as the Downloads folder, you’ll use the command:
Start-MpScan -ScanPath C:\Users\{yourname}\Downloads
If you want to check for new virus signature definition updates, you’ll use the command:
Update-MpSignature
SEE: How to enable PowerShell Remoting via Group Policy
Accessing the malware signature definitions database
As I mentioned, the Get-MpThreatCatalog cmdlet really caught my attention because it lets you investigate all the malware threats Windows Defender can protect against. While you can run the Get-MpThreatCatalog cmdlet by itself, it’s hard to grasp, as the exhaustive list will scroll by on the screen as a blazing speed and takes several minutes to complete. However, I encourage you to give it a shot just to get feel for how many definitions Window Defender has in its database. To do so, at the PowerShell prompt, type the command:
Get-MpThreatCatalog
As the list of records is scrolling, you can press the Pause key on your keyboard at any time to pause the output. If you want to cancel the output, just press [Ctrl]+C. If you pause or cancel the output, you’ll see a record for each threat in the database that looks similar to this:
CategoryID: 4

SeverityID: 5

ThreatID: 5145

ThreatName: TrojanDownloader:Win32/Zlob.CH

TypeID: 0

PSComputerName:
To clarify, let’s continue by taking a brief look at each field in the record.
CategoryID
The CategoryID value indicates the type of malware listed in the record. The values are described in the following table.
| ID | Type of malware |
| 0 | Invalid |
| 1 | Adware |
| 2 | Spyware |
| 3 | Passwordstealer |
| 4 | Trojandownloader |
| 5 | Worm |
| 6 | Backdoor |
| 7 | Remoteaccesstrojan |
| 8 | Trojan |
| 9 | Emailflooder |
| 10 | Keylogger |
| 11 | Dialer |
| 12 | Monitoringsoftware |
| 13 | Browsermodifier |
| 14 | Cookie |
| 15 | Browserplugin |
| 16 | Aolexploit |
| 17 | Nuker |
| 18 | Securitydisabler |
| 19 | Jokeprogram |
| 20 | Hostileactivexcontrol |
| 21 | Softwarebundler |
| 22 | Stealthnotifier |
| 23 | Settingsmodifier |
| 24 | Toolbar |
| 25 | Remotecontrolsoftware |
| 26 | Trojanftp |
| 27 | Potentialunwantedsoftware |
| 28 | Icqexploit |
| 29 | Trojantelnet |
| 30 | Filesharingprogram |
| 31 | Malware_Creation_Tool |
| 32 | Remote_Control_Software |
| 33 | Tool |
| 34 | Trojan_Denialofservice |
| 36 | Trojan_Dropper |
| 37 | Trojan_Massmailer |
| 38 | Trojan_Monitoringsoftware |
| 39 | Trojan_Proxyserver |
| 40 | Virus |
| 42 | Known |
| 43 | Unknown |
| 44 | Spp |
| 45 | Behavior |
| 46 | Vulnerability |
| 47 | Policy |
SeverityID
The SeverityID value identifies how dangerous the threat is on a scale of 1-5. The values are described in the following table.
| ID | Severity |
| 0 | Unknown |
| 1 | Low |
| 2 | Moderate |
| 4 | High |
| 5 | Severe |
(I’m not sure what happened to SeverityID 3.)
ThreatID
The ThreatID value is simply a number assigned to the record.
ThreatName
The ThreatName is the name given to the malware.
TypeID
The TypeID value specifies how the malware is identified. The values are described in the following table.
| ID | Identification method |
| 0 | Known bad threat |
| 1 | Behavior monitoring |
| 2 | Unknown threat |
| 3 | Known good threat |
| 4 | Network Inspection System (NIS) threat |
(Everything listed in my catalog had a TypeID of 0.)
PSComputerName
This value was blank for every entry in my catalog, and I’m not sure exactly what value would be assigned to this item.
Caveats
As you explore these PowerShell commands, keep in mind that Windows Defender’s malware definitions database is huge. As such, it may take a little while between the time that you enter the command and the time you actually see output on the screen. So be patient!
Another thing to keep in mind is that PowerShell may choke up a bit while delving into the database and display a error message:
WARNING: Memory usage of a cmdlet has exceeded a warning level.
In most cases, PowerShell will recover and run the command normally. However, it may take a little while before you actually see output on the screen. Again, be patient!
If PowerShell doesn’t eventually run the command, you can cancel it by pressing [Ctrl]+C. In some cases, the command simply won’t run and you’ll be returned to the prompt.
One more thing: If the screen becomes too crowded for your taste, you can use the good old CLS command to clear the screen.
Delving into the definitions database
Now that you have an idea of what kind of information is contained in Windows Defender’s malware definitions database, let’s take a look at how you can use PowerShell to create queries and extract pertinent details. For example, suppose that you want to see all the records in the database for the most severe malware. To do so, you type the following command at the PowerShell prompt:
Get-MpThreatCatalog | where-object {$_.SeverityID -eq "5"}
This command line pipes the output of the Get-MpThreatCatalog cmdlet into the where-object cmdlet, which is configured to snag only those records that have a SeverityID of 5.
If you would rather just see the names of the most severe malware, as opposed to seeing the whole record, type the following command at the PowerShell prompt:
Get-MpThreatCatalog | where-object {$_.SeverityID -eq "5"} | select ThreatName
If you would rather see the output on the screen one page at a time, type the following command at the PowerShell prompt:
Get-MpThreatCatalog | where-object {$_.SeverityID -eq "5"} | select ThreatName | more
This command line pipes the output into the more command, which in turn displays the output one page at a time. To advance the page, press [SpaceBar]. If you press [Enter], the screen will advance one line at a time.
As you see in the CategoryID table, Windows Defender recognizes a lot of types of malware. So if you want to hone in on one type, you can do so. For instance, suppose that you want to see only the viruses in Windows Defender’s malware definitions database. To do so, you would type the following command at the PowerShell prompt:
Get-MpThreatCatalog | where-object {$_.ThreatName -Match "^Virus.*"} | select ThreatName | more
If you want to see only the viruses that have a SeverityID of 5, you would type the following command at the PowerShell prompt:
Get-MpThreatCatalog | where-object {$_.SeverityID -eq "5"} | where-object {$_.ThreatName -Match "^Virus.*"} | select ThreatName | more
Using these examples along with other fields, you should be able to construct additional queries to pull details out of Windows Defender’s malware definitions database.
Also see…
- Windows Defender: Past, present, and future
- How to get more from Windows Defender by using its command-line tool
- Microsoft announces new Windows Defender Advanced Threat Protection (but there’s a catch)
- Microsoft: Beware this fake Windows BSOD from tech support scammers’ malware
- Admin spotlight: Saving time with PowerShell (Tech Pro Research)
What’s your take?
After using PowerShell to look through the threats that Windows Defender can guard against, are you more confident in its ability to protect your computer? What PowerShell queries did you come up with? Share your thoughts with fellow TechRepublic members.
