


Securing web applications is an inherently complex proposition. Spring Security offers Java developers a powerful framework for addressing this need, but that power comes with a steep learning curve.
This article offers a concise survey of the essential components behind securing a REST API with Spring Security. We’ll build a simple app that uses a JSON Web Token (JWT) to store the user’s information.
JWT is fast becoming the standard approach to holding auth information because of its simplicity and compactness.
A simple secure REST API
Here’s what we want our simple app to do:
- Provide a UI with a button that sends a request to a back-end endpoint.
- Provide a username and password field for users to log in.
- If the API button is clicked and the user is not logged in, reject the endpoint call with a “HTTP 401 Forbidden” response.
- If the user is logged in, send them the response from the endpoint.
This simple app will demonstrate all of the components required for using Spring with JWT to secure a REST API. The complete, operational version of the example app is here.
Before we begin, I’ll give you a birds-eye overview, and then visit each file in the project once to highlight the most important elements.
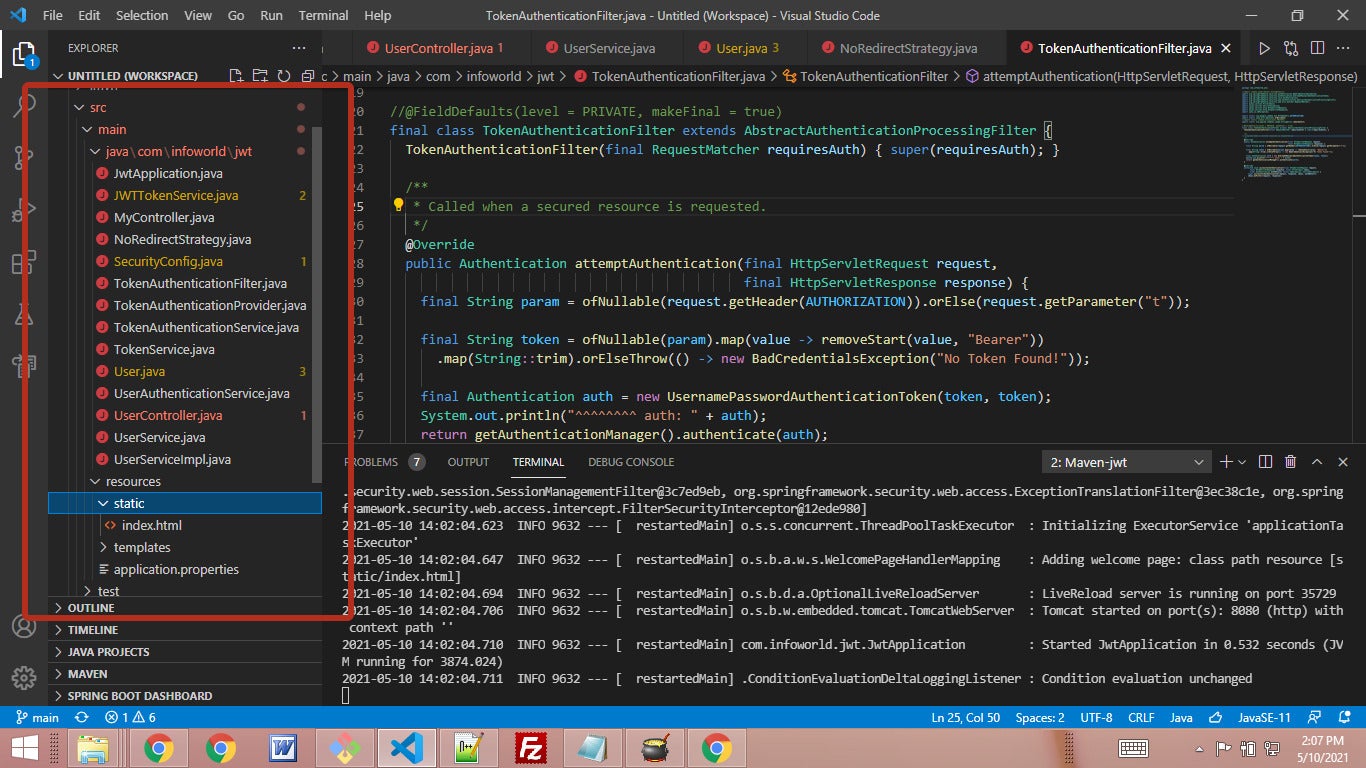
The project files and layout are seen in the red highlighted area of Figure 1.
 IDG
IDG
Figure 1. A simple secure REST API project.
The class files involved in the sample app are listed below (linked to their sources).
JwtApplication.java: The main app file, created by Spring Boot.- JWTTokenService.java: The implementation of
TokenService, used byTokenAuthenticationService. MyController.java: The web controller that contains the protected endpoint.NoRedirectStrategy: Used inSecurityConfig.javato avoid Spring Security’s default redirection behavior.SecurityConfig.java: Responsible for configuring Spring Security.TokenAuthenticationFilter.java: Responsible for checking for user auth info when secured resources are requested. Applied bySecurityConfig.java.TokenAuthenticationProvider.java: Supplied bySecurityConfig.javato the AuthenticationManager to provide a way to recover the user inTokenAuthenticationFilter.TokenAuthenticationService.java: The token-based implementation ofUserAuthenticationService.TokenService.java: Used byTokenAuthenticationServiceto create and verify JWT tokens. Implemented byJWTTokenService.User.java: A simple implementation of the SpringUserDetailsinterface. Used to hold user info.UserAuthenticationService.java: A middleware service. Used byUserController.javato handle the business logic of log-in and byTokenAuthenticationProviderto find users by token.UserController.java: The web controller that provides the log-in API.UserService.java: An interface for finding users. Used byTokenAuthenticationServiceto recover the user via the token info.UserServiceImpl.java: The implementation ofUserService.java. In this case, a simple collection of users.
To keep things as simple as possible and make it easier to get your mind around things, I’ve spurned Java best practice and put all of the classes you will use in a single package.
There is also an index.html file serving the simple front end from /resources/static.
The front end with simple log-in capability
Spring Web will by default serve files in the resources/static folder. That is where the client lives in the form of a small index.html file. This will give you a sense of how a JavaScript front end interacts with the server security.
This simple index.html file allows the user to click a button and see the message returned from the protected endpoint. It also provides a simple log-in capability. You can see the JS for handling these interactions in Listing 1.
Listing 1. The protected API and login calls (index.html)
<script>
  let token = null;
  async function protectedAPI(){
    let headers = {};
    if (token) headers["Authorization"] = "Bearer " + token;
    let response = await fetch("/protected", {
      headers
    });
    let text = await response.text();
    if (response.ok){
      document.getElementById("protectedMessage").innerHTML = text;
    } else {
      document.getElementById("protectedMessage").innerHTML = "You must log in first";
    }
  }
  async function login(){
    let response = await fetch("/open/login", {
      method: 'post',
      body:
JSON.stringify({username:document.getElementById("username").value,password:document.getElementById("password").value}),
      headers: {
        "Content-Type": "application/json"
      }
    });
    if (response.ok){
      let text = await response.text();
      token = text;
      document.getElementById("login-msg").innerHTML = "Login success";
    } else {
      document.getElementById("login-msg").innerHTML = "Failed to login: " + response.status;
    }
  }
</script>
Listing 1 relies on two API endpoints: /open/login and /protected. It uses the results of the login call to set the value of the token variable, and if the token is present, the protected call sends the token in the authorization header. The server will use that token to validate the user’s auth when the user accesses the secure endpoint.
The protected endpoint (
MyController is a straightforward Spring Web REST mapping, as seen in Listing 2.
Listing 2. MyController.java
@GetMapping({ "/protected" })
public String protectedEndpoint() {
  return "Protected Endpoint Response";
}
Notice that no security wiring is present at the mapped route level.
SecurityConfig.java
The SecurityConfig.java file is the center of the security setup. Let’s begin there and move outward.
The class is annotated with @configuration and @EnableWebSecurity, which alerts Spring to the fact that security is active and that this class will apply settings to it.
The bulk of that work is done in the configure() method seen in listing 4.
Listing 3. SecurityConfig.configure()
private static final RequestMatcher PUBLIC_URLS = new OrRequestMatcher(
    new AntPathRequestMatcher("/"), new AntPathRequestMatcher("/open/**")
  );
  TokenAuthenticationProvider provider;
  private static final RequestMatcher PROTECTED_URLS = new NegatedRequestMatcher(PUBLIC_URLS);
  protected void configure(final HttpSecurity http) throws Exception {
    http
      .sessionManagement()
      .sessionCreationPolicy(STATELESS)
      .and()
      .exceptionHandling()
      .defaultAuthenticationEntryPointFor(forbiddenEntryPoint(), PROTECTED_URLS)
      .and()
      .authenticationProvider(provider)
      .addFilterBefore(restAuthenticationFilter(), AnonymousAuthenticationFilter.class)
      .authorizeRequests()
      .requestMatchers(PROTECTED_URLS)
      .authenticated()
      .and()
      .csrf().disable()
      .formLogin().disable()
      .httpBasic().disable()
      .logout().disable();
  }
  TokenAuthenticationFilter restAuthenticationFilter() throws Exception {
    final TokenAuthenticationFilter filter = new TokenAuthenticationFilter(PROTECTED_URLS);
    filter.setAuthenticationManager(authenticationManager());
    filter.setAuthenticationSuccessHandler(successHandler());
    return filter;
  }
A few comments on Listing 3. The configure method uses an Ant pattern matcher (PROTECTED_URLS) to allow requests to the static directory ("/") and anything after the ("/open/") path to pass through without an auth check. This means you can still hit the /static/index.html file, and the log-in endpoint can be hosted at /open/login.
Notice that the configuration also adds in provider, which is a TokenAuthenticationProvider, and a filter, which is handled by a TokenAuthenticationFilter. Notice that the filter goes before the AnonymousAuthenticationFilter, which is part of Spring Security.
The auth filter (TokenAuthenticationFilter.java)
TokenAuthenticationFilter is responsible for checking the requests that come into the protected URLs. The work is done in Listing 4.
Listing 4. The filter logic
@Override
  public Authentication attemptAuthentication(final HttpServletRequest request,
                                              final HttpServletResponse response) {
    final String param = ofNullable(request.getHeader(AUTHORIZATION)).orElse(request.getParameter("t"));

    final String token = ofNullable(param).map(value -> removeStart(value, "Bearer"))
      .map(String::trim).orElseThrow(() -> new BadCredentialsException("No Token Found!"));

    final Authentication auth = new UsernamePasswordAuthenticationToken(token, token);
    return getAuthenticationManager().authenticate(auth);
  }

  @Override
  protected void successfulAuthentication(final HttpServletRequest request,
        final HttpServletResponse response, final FilterChain chain,
        final Authentication authResult) throws IOException, ServletException {
      super.successfulAuthentication(request, response, chain, authResult);
      chain.doFilter(request, response);
  }
Basically, the filter pulls the token (the one sent by the front-end JS) out of the authorization header. If it’s not there, an exception is raised. If it’s there, it is handed off to the authentication manager, where it will eventually be handled by the TokenAuthenticationProvider you just saw in SecurityConfig.
Checking the token (TokenAuthenticationProvider.java)
TokenAuthenticationProvider is in charge of recovering the user based on the auth token. It has just a single method that delegates its work to UserAuthenticationService, as seen in Listing 5.
Listing 5. TokenAuthenticationProvider.retrieveUser()
@Autowired
UserAuthenticationService auth;
//...
@Override
  protected UserDetails retrieveUser(final String username, final UsernamePasswordAuthenticationToken authentication) {
    final Object token = authentication.getCredentials();
    return Optional.ofNullable(token).map(String::valueOf).flatMap(auth::findByToken)
      .orElseThrow(() -> new UsernameNotFoundException("Couldn't find user: " + token));
  }
If the user is null, an exception is raised.
UserAuthenticationService.java and TokenAuthenticationService.java
TokenAuthenticationService is the implementation that will be auto-wired into TokenAuthenticationProvider. It supplies the findByToken method used to retrieve the user.
TokenAuthenticationService is also where the log-in flow comes together with the authentication flow. It provides the login() method used by the UserController. Both methods are seen in Listing 6.
Listing 6. TokenAuthenticationService methods
@Autowired
  TokenService tokenService;
  @Autowired
  UserService users;

  @Override
  public Optional<String> login(final String username, final String password) {
    return users
      .findByUsername(username)
      .filter(user -> Objects.equals(password, user.getPassword()))
      .map(user -> tokenService.newToken(ImmutableMap.of("username", username)));
  }

  @Override
  public Optional<User> findByToken(final String token) {
    System.out.println("$$$$$$$$$$$$$$$$$$$$ token: " + token);
    return Optional
      .of(tokenService.verify(token))
      .map(map -> map.get("username"))
      .flatMap(users::findByUsername);
  }
Both methods — findByToken and login — rely on TokenService and UserService. findByToken takes a token, then uses tokenService to verify its validity. If the token is good, findByToken uses UserService to get the actual user object.
login does the reverse: It takes a user name, grabs the user with userService, verifies that the password matches, then uses tokenService to create the token.
TokenService.java and JWTTokenService.java
JWTTokenService is the place where the actual JWT token is handled. It relies on the JJWT library to do the work, as seen in Listing 7.
Listing 7. JWTTokenService
JWTTokenService() {
    super();
    this.issuer = requireNonNull("infoworld");
    this.secretKey = BASE64.encode("www.infoworld.com");
  }
  public String newToken(final Map<String, String> attributes) {
    final DateTime now = DateTime.now();
    final Claims claims = Jwts.claims().setIssuer(issuer).setIssuedAt(now.toDate());

    claims.putAll(attributes);

    return Jwts.builder().setClaims(claims).signWith(HS256, secretKey).compressWith(COMPRESSION_CODEC)
      .compact();
  }

  @Override
  public Map<String, String> verify(final String token) {
    final JwtParser parser = Jwts.parser().requireIssuer(issuer).setClock(this).setSigningKey(secretKey);
    return parseClaims(() -> parser.parseClaimsJws(token).getBody());
  }

  private static Map<String, String> parseClaims(final Supplier<Claims> toClaims) {
    try {
      final Claims claims = toClaims.get();
      final ImmutableMap.Builder<String, String> builder = ImmutableMap.builder();
      for (final Map.Entry<String, Object> e: claims.entrySet()) {
        builder.put(e.getKey(), String.valueOf(e.getValue()));
      }
      return builder.build();
    } catch (final IllegalArgumentException | JwtException e) {
      return ImmutableMap.of();
    }
  }
The JJWT library makes it pretty easy to create, parse, and verify JWT tokens. The newToken() method uses Jwts.claims() to set a couple of standard claims (issuer and issuedAt) and any other claims passed in as arguments. In the case of log-ins, this will contain the user name. That means the user name is available to deserialize later in the auth process. At this point, the app could also add other claims like roles or explicit permission types.